
Using Figure-8 Microphones
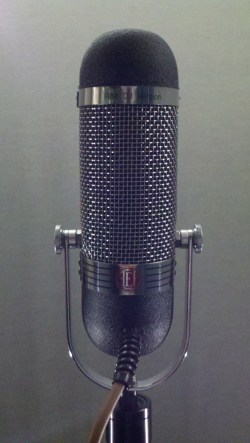
The first time I used a figure-8 (or bi-directional) microphone I wasn’t choosing the pattern so much as a microphone that happened to also exhibit the pattern: a ribbon microphone. I loved the sound of the mic, but I wasn’t accustomed to the back side picking up sound with the same sensitivity as the front.
I suspect I’m not the only one who initially considered this a consequence rather than a feature. And because I was focused on the tonal quality instead of the pickup pattern, it seemed like a trade-off between a sound I wanted and a pattern that was unfamiliar to me.
Many sessions later, I not only learned how to better use a figure-8 ribbon, I started finding advantages to the pattern, even when I wasn’t using a ribbon microphone. One of the keys to favoring figure-8 was the realization that equal front and rear sensitivity includes rejection everywhere else. Remember: figure-8 rejects sounds 90 degrees off-axis. That means to the left and the right of the microphone, and it also means above and below. So while the shape of the pickup looks like the number 8, the shape of the rejection looks like a donut!
Here are some reasons to intentionally choose the figure-8 pattern:
1. Face-To-Face Interview
Do you want to hear two people talking to each other while rejecting all other sound above, below, and to the sides of them? Put a microphone with a figure-8 pattern between them! One mic, two people, fantastic isolation. This works best when both mouths are on-axis with each side of the microphone, and their speaking volumes are similar (as opposed to one who speaks loudly, another who speaks quietly). Typically these people are not right up on the microphone (or each other), but a bit further away, for a relaxed conversation with a comfortable distance between them.
2. Reject Off-Axis Sound
When recording symphonic music, harp can go missing in the main array. But a cardioid spot mic on harp often gets as much brass as the main array. A figure-8 microphone, set about as high as the player’s head, pointing straight down at the soundboard works great. Why? Because the side of the mic rejects the most in figure-8. Point the side of the mic toward the brass section! The back of the mic is sensitive, but it points straight up, which is typically the flyway space for curtains, flats, lights, etc. on a live performance stage. You get a lot of harp from the font of the mic, and some distant room from the rear of the mic. With clever positioning this trick works with non-harp sound sources too.
3. Tight Pickup
The on-axis sensitivity, both front and back, is tighter with figure-8 than any other directional pattern. Point a figure-8 at sources while listening to the output of the mic using headphones. It’s like pointing a laser. You’ve got to be clever to point the rear of the microphone at something else you want to record, or minimize what the rear lobe “hears” by pointing it at something acoustically absorbent, or very far away. The figure-8 pattern can help you isolate something specific because the on-axis response is so narrow.
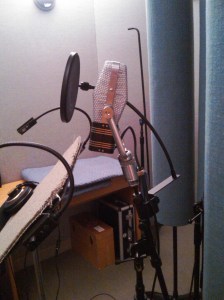
AEA 44cx with baffle behind
4. Intentionally Capture a Mixture of Direct and Reflected Sound
If the space in which you are recording sounds good, capturing some of it can enhance the recording. Reverb or simpler reflections are sometimes included in a recording using the omni-directional pattern, but it will also work with a figure-8 pattern. If you want more of the room acoustics, move the mic away from the source. If you want less room, move the mic closer to the source and/or point the rear of the pattern toward a less reflective part of the room.
5. Room / Ambience Microphone
Anytime you have direct sound in a room mic, you create a possibility for artificial sounding Comb-Filtering. Remember the donut shaped sound rejection pattern of the figure-8? That comes in super handy for isolating reflected sound from the direct sound. So aim the sound-rejecting 90 degree off-axis part of the figure-8 pattern toward the primary sound source and you can isolate it from the reflected sounds captured by the on-axis front and rear lobes. Tip: Consider if you want the lobes to point at reflecting surfaces that are equidistant to the front and back, or not. If they are similarly reflective (both flat plaster, for example) the delay of the two reflections and the volume of the two reflections will be heard similarly. As you move away from reflective surfaces the sound takes longer to reach the mic, and the reflection gets quieter in the mic. The opposite is true for a lobe of the pattern moving closer to a reflective surface. And this is true for any room microphone pattern, but often more important to consider because sound enters with the same intensity into opposite sides of the same figure-8 element.
6. Stereo Recording with Mid-Side, or Blumlein
These two incredibly flexible stereo recording techniques are built around the figure-8 microphone pattern. Most stereo mic setups force you to decide how wide the stereo image should be before you start recording. Mid-Side and Blumlein can be adjusted in post. So if you misjudged in the field, these techniques give you some opportunity to tweak later for a better result.
So far I’ve avoided mentioning that the rear lobe has opposite polarity to the front lobe of the figure-8. Both lobes have the same sensitivity, but the rear lobe has a negative polarity. It seems appropriate to mention here because the opposing polarity of the two sides allows figure-8 mic users to represent both sides of a spacious audio presentation as stereo from a single “Side” channel when anchored against the “Middle” mic channel. It’s a neat trick developed from some of the earliest days of stereo recording theory.
While often touted as Mono Compatible, my mentor Dave Appelt suggested that it might be more accurate to call Mid-Side: Mono Destructive. Because when you collapse a Mid-Side recording to mono by panning L and R to the middle, the Side signal cancels itself. In other words, all sounds that were in the Side part of the recording are no longer there. That’s not necessarily a bad thing, just a more honest way to evaluate the manner in which Mid-Side collapses to mono.
Recording with the Mid-Side Microphone Configuration
By contrast, all sources in both elements of a Blumlein recording continue to be audible when you collapse it to mono by panning L and R to the middle. These two signals are truly Mono Compatible because nothing perfectly cancels as you pan in; it simply gets more and more narrow without the audible Comb-Filter effects that are sometimes a problem with spaced-pair and near-coincident stereo microphone techniques.
Much more could be said about Mid-Side stereo, including a decent tutorial, and Blumlein stereo too. I plan to write more about them in future posts.
See also
Unidirectional Ribbon Microhones
Beyond Figure-8 Ribbon Microphones
The $60,000 Ribbon Mic Shootout from RecordingHacks
What Is Blumlein Technique from Audio Engineering Associates, including audible examples

Leave a comment